Cavity insulation is a critical component of any energy-efficient home in Milwaukee, WI.
By filling the empty spaces within your walls, cavity insulation helps maintain a comfortable indoor temperature, reduces energy bills, and prevents moisture issues.
In this expert guide, we’ll explore the best practices for choosing and installing cavity insulation to maximize your home’s performance.
Choosing the Best Cavity Insulation Material for Milwaukee’s Climate
Milwaukee’s climate, with its cold winters and warm summers, requires insulation that can effectively regulate temperature and moisture.

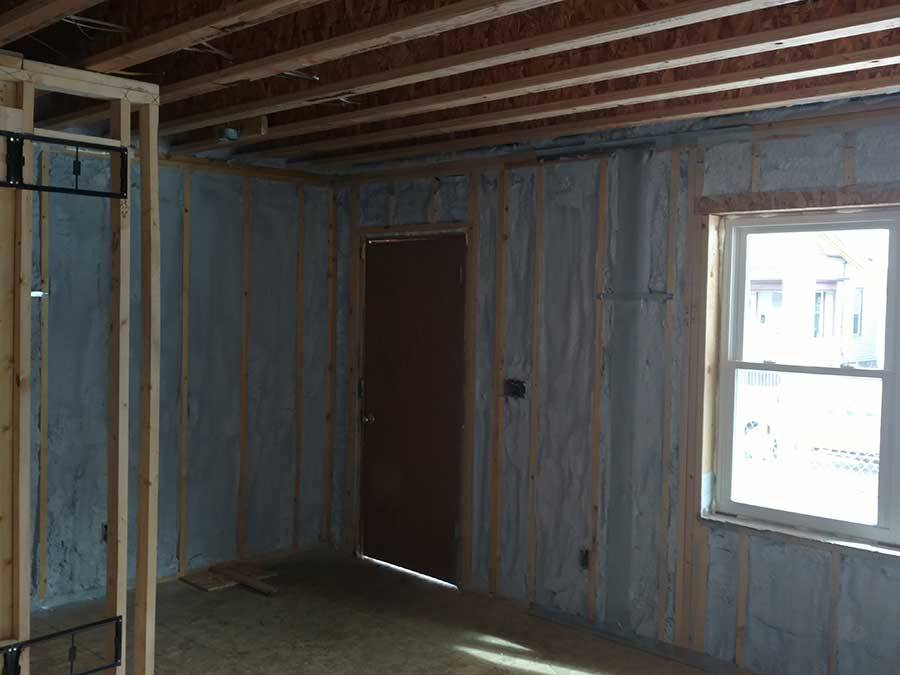
Cavity insulation installed in framed walls for improved energy efficiency
Several cavity insulation materials are available, each with unique properties and benefits.
| Material | R-Value per inch | Moisture Resistance |
|---|---|---|
| Fiberglass | 2.2 – 2.7 | Good |
| Cellulose | 3.1 – 3.8 | Excellent |
| Spray Foam | 3.6 – 6.5 | Excellent |
For Milwaukee homes, we recommend:
- Cellulose insulation for its excellent moisture resistance and high R-value
- Closed-cell spray foam for its superior insulating properties and air sealing capabilities
- Fiberglass batts for a cost-effective solution in drier areas of the home
Maximizing Energy Savings with Proper Cavity Insulation Installation
Proper installation is key to achieving the full benefits of cavity insulation.
A skilled installer will ensure that the insulation is placed correctly, without gaps or compression, to create a consistent thermal barrier.
This attention to detail can lead to significant energy savings for Milwaukee homeowners.
| Insulation Level | Annual Energy Savings | 10-Year Savings |
|---|---|---|
| R-13 to R-19 | 15% | $1,500 |
| R-19 to R-30 | 20% | $2,000 |
| R-30 to R-50 | 25% | $2,500 |
To maximize your energy savings, choose a professional insulation installer who:
- Is licensed and insured
- Has experience with the specific insulation material you’ve chosen
- Follows industry best practices and manufacturer guidelines
- Offers a warranty on their work
Ensuring Correct Installation for Optimal Performance
Correct cavity insulation installation involves several key steps:
- Assessing the wall cavity for any pre-existing issues, such as moisture or pest damage
- Measuring the cavity to determine the appropriate amount of insulation needed
- Cutting the insulation to fit snugly within the cavity, ensuring no gaps or compression
- Installing a vapor barrier, if necessary, to prevent moisture infiltration
- Sealing any air leaks around electrical outlets, windows, and doors
Common installation mistakes to avoid include:
- Compressing the insulation, which reduces its R-value
- Leaving gaps or voids, allowing air leaks and thermal bridging
- Failing to address moisture issues before installation
- Not following manufacturer guidelines for proper handling and installation
Homeowners can inspect their newly installed insulation by:
- Visually checking for gaps, compression, or inconsistencies
- Using a thermal camera to identify any areas of heat loss
- Monitoring energy bills for improvements in efficiency
Identifying and Addressing Moisture Concerns in Cavity Insulation
Moisture accumulation in cavity insulation can lead to mold growth, structural damage, and reduced insulation performance.
Common signs of moisture issues include:
- Visible water stains or discoloration on walls
- Musty odors or signs of mold growth
- Peeling paint or wallpaper
- Frost or condensation on interior walls during cold weather
| Moisture Source | Prevention Strategy | Remediation |
|---|---|---|
| Leaky pipes or roofs | Regular maintenance and repairs | Identify and fix leaks, replace damaged insulation |
| Humidity and condensation | Install vapor barriers, control indoor humidity | Improve ventilation, use dehumidifiers |
| Flooding or water infiltration | Proper grading and drainage, waterproofing | Remove water-damaged materials, disinfect, re-insulate |
If moisture issues are suspected, it’s crucial to address them promptly to prevent further damage and maintain the effectiveness of the cavity insulation.
Reducing Air Leakage with Effective Cavity Insulation
Cavity insulation plays a vital role in reducing air leakage, which can account for up to 30% of a home’s heating and cooling costs.
By filling the gaps and creating a continuous thermal barrier, cavity insulation helps prevent conditioned air from escaping and unconditioned air from entering the home.
To further improve air tightness, consider:
- Caulking and weatherstripping around windows and doors
- Sealing penetrations for electrical outlets, plumbing, and ductwork
- Installing air barriers, such as house wrap or rigid foam board
By combining effective cavity insulation with air sealing measures, Milwaukee homeowners can enjoy a more comfortable, energy-efficient home with lower utility bills and a reduced carbon footprint.
Why Cavity Insulation is Crucial for Milwaukee Homes
In summary, cavity insulation is a critical investment for Milwaukee homeowners seeking to improve their home’s energy efficiency, comfort, and durability.
By choosing the right insulation material and ensuring proper installation, homeowners can reap the benefits of lower energy bills, stable indoor temperatures, and reduced moisture risks.
As Milwaukee continues to experience cold winters and warm summers, the importance of effective cavity insulation cannot be overstated.
Proper insulation not only enhances the livability of a home but also contributes to its long-term value and sustainability.
By prioritizing cavity insulation and following the expert tips outlined in this guide, Milwaukee homeowners can create a more comfortable, efficient, and resilient living space that will serve them well for years to come.

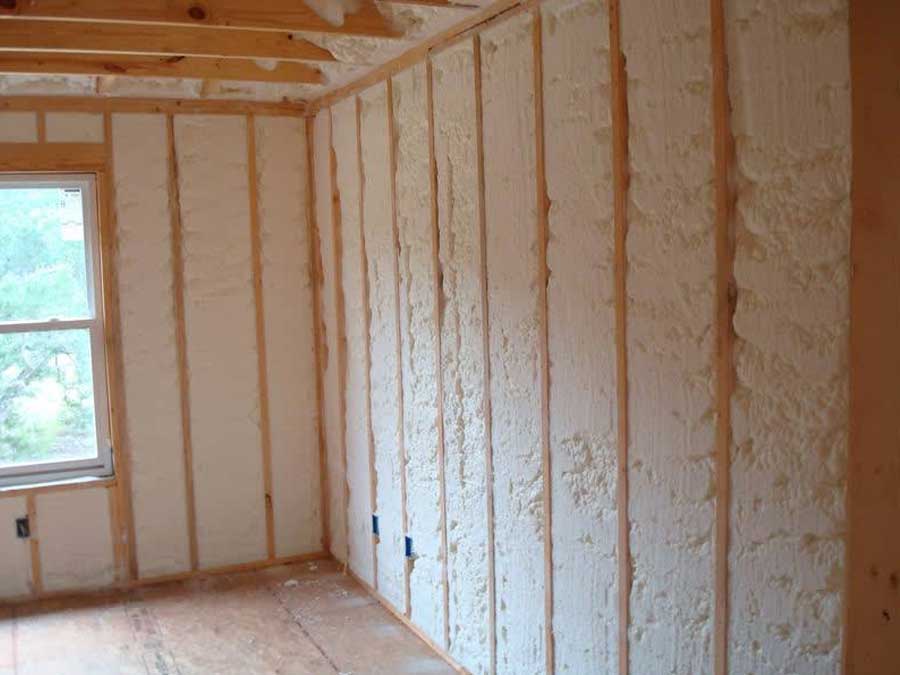
Spray foam cavity insulation applied in a wood-framed wall for thermal efficiency
Frequently Asked Questions
What is the best type of cavity insulation for Milwaukee’s climate?
For Milwaukee’s climate, we recommend cellulose insulation for its moisture resistance, closed-cell spray foam for its superior insulating properties, and fiberglass batts for a cost-effective solution in drier areas of the home.
How much can I save on energy bills with proper cavity insulation?
Depending on the level of insulation installed, Milwaukee homeowners can save 15-25% on their annual energy bills, amounting to $1,500 to $2,500 in savings over a 10-year period.
How do I know if my cavity insulation is installed correctly?
Homeowners can visually inspect their insulation for gaps, compression, or inconsistencies, use a thermal camera to identify areas of heat loss, and monitor energy bills for improvements in efficiency.
What are the signs of moisture issues in cavity insulation?
Signs of moisture issues in cavity insulation include visible water stains or discoloration on walls, musty odors, mold growth, peeling paint or wallpaper, and frost or condensation on interior walls during cold weather.
Can cavity insulation help reduce air leakage in my home?
Yes, cavity insulation helps reduce air leakage by filling gaps and creating a continuous thermal barrier. When combined with air sealing measures like caulking and weatherstripping, cavity insulation can significantly improve a home’s air tightness and energy efficiency.


